Tuesday, September 18, 2012

1st Birthday

John Michael McKenzie's 1st Birthday
Last Tuesday, my nephew celebrated his 1st birthday. My mom and I had not seen my sister, brother-in-law, and nephew in a month since their move to Shreveport, LA. We decided to drive there on his birthday to celebrate and spend the week. I decided before I left home that I would make John Michael a healthy smash cake. If you haven't heard of a smash cake, it is the cake specially made for the birthday boy/girl and he or she usually smashes into it. haha!

So for John Michael's cake I used my sweet potato-banana muffin recipe  but cut out the sweet potato part and added more banana http://whitneymillermc.blogspot.com/2011/12/you-can-do-it.html I used mostly honey for sweetener and Greek yogurt to add moistness for some of the butter that I eliminated. JM loves bananas. He is our little monkey (:
I prepared the topping at my sister's house which was simply whipping cream I beat until soft peaks then whisked in some vanilla yogurt. I piped the "icing" onto his cake by cutting a slit into the corner of a zip top bag.
John Michael didn't quite know what to think of the cake so his daddy gave him a little taste of the "icing" and it was all over from there.
                                                       Needless to say he loved it!
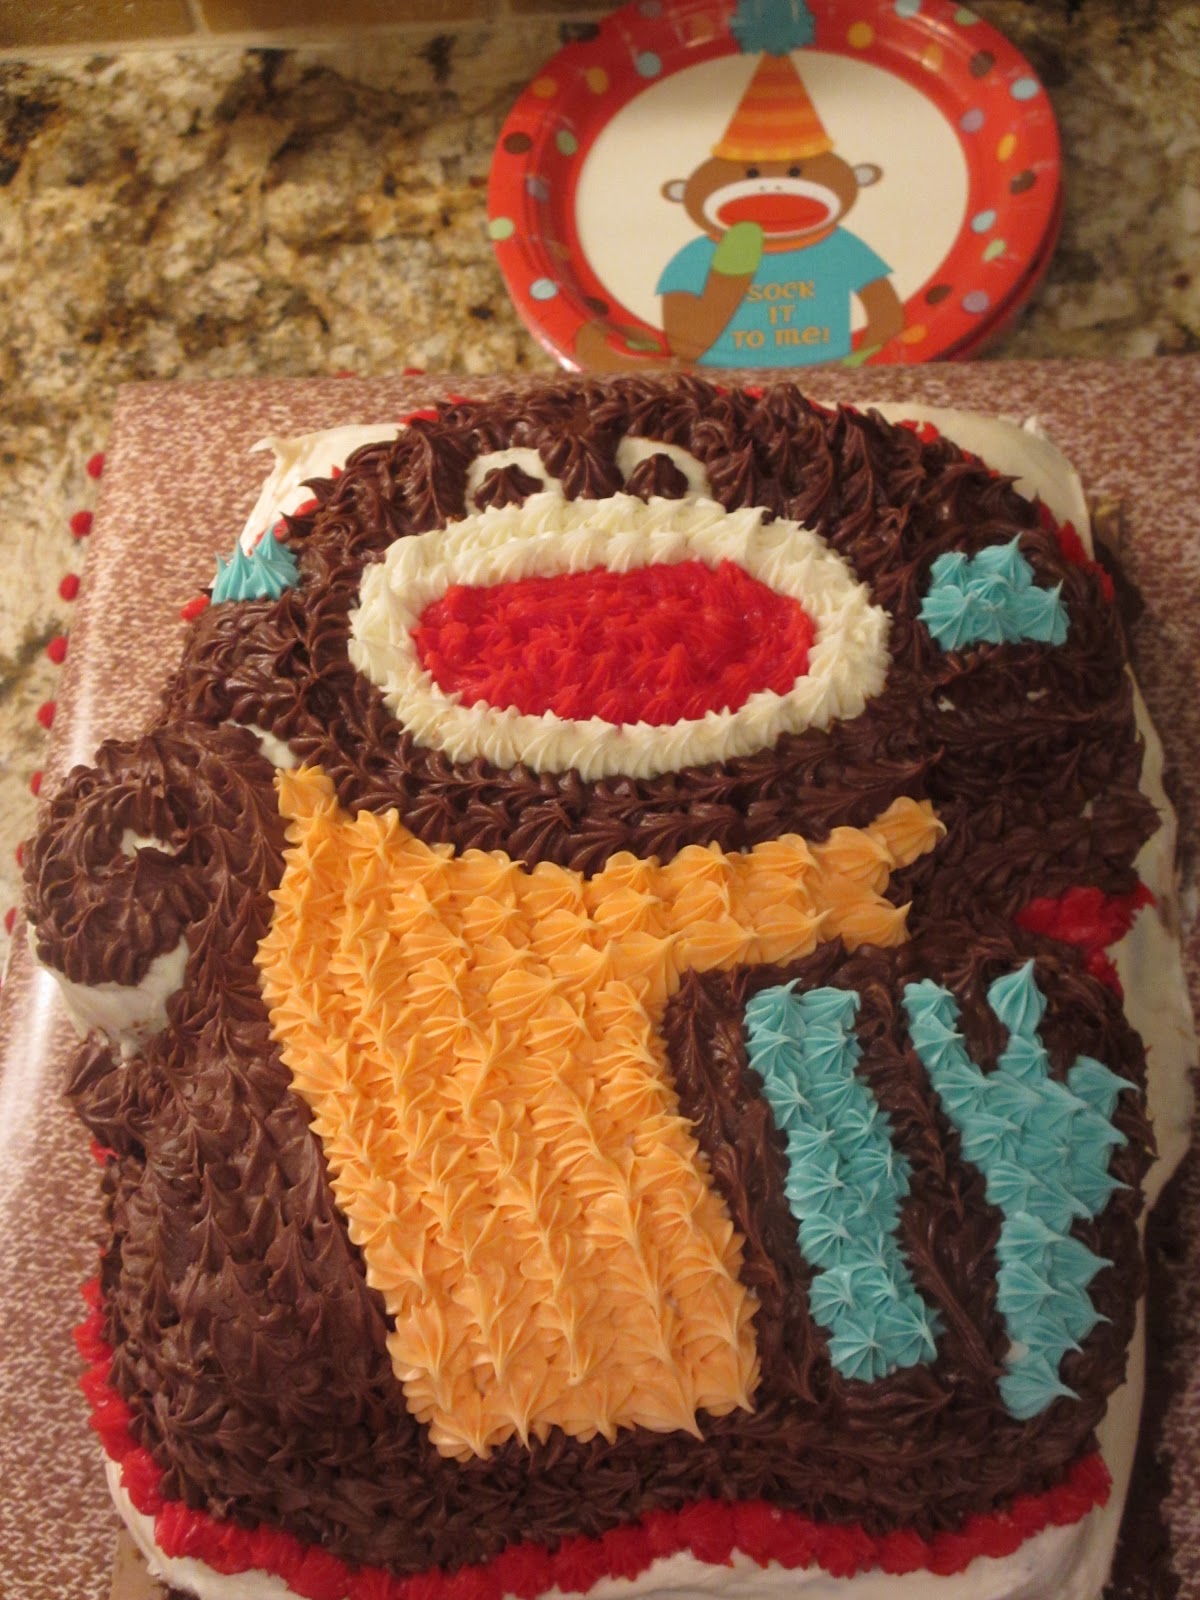
On Saturday we had a birthday party for John Michael with my dad and younger sister and my brother-in-law's family. Again, I wanted to make John Michael a smash cake. My sister asked my mom to make the big cake which was a monkey cake to go along with the monkey theme of the party. I decided to make our little monkey a banana flavored but also shaped cake.
 For this cake, I baked a round cake and cut it into a peeled banana. For the "icing," I wanted it to hold better than just whipped cream so I beat whipping cream until soft peaks and added some Dream Whip as a stabilizer and a little powdered sugar for sweetness. I colored some of the "icing" yellow and some brown. It was so simple and easy to make and decorate his cake.
The monkey cake my mom made turned out so cute and most importantly it tasted good too.
 My crafty older sister made these jars to hold peanut candy (monkey food), m&ms (monkey poop), and twizzlers (monkey vines). She simply wrapped ribbon around each jar and placed a cut out circle from wrapping paper on top of it.  She then taped on the felt monkey head that she bought from a craft store. The whole expense of the craft project probably cost $12 which includes the price of the jars which came from Fred's dollar store.

Monday, September 10, 2012

Sweet Potatoes

Whether I am visiting a city for business or pleasure, experiencing the local cuisine is always on the agenda. My mom traveled with me this past weekend to Winston-Salem for the Bookmarks Festival. Last week, I just so happened to run into Robert St. John at one of his restaurants in Hattiesburg, MS. After telling him about my upcoming trip, he expressed that I needed to visit Sweet Potatoes restaurant. I was excited to get a recommendation before I even left and he had me at sweet potatoes, one of my favorite vegetables.

Fast forward to Friday night, all of the authors were invited to a meet and greet. Heavy appetizers were served, but Mom and I made sure to save room for dinner because we planned to visit Sweet Potatoes. Robert wasn't the only one to suggest the restaurant; almost everyone since my arrival to Winston-Salem had suggested it as well.

Sweet Potatoes is a Southern restaurant with a unique twist. Sweet potatoes can be found in most items throughout the menu. Mom and I began with the fried okra and green tomato basket served with a sweet potato aioli. Sweet potatoes in an aioli intrigued me. (An aioli is basically a mayonnaise base flavored with garlic.)
Many of their entrees are served with sweet potatoes in some form including mashed or candied, in a cornbread and a cornbread dressing. We had their yard bird which was a smothered chicken dish. The waitress said that it was one of the popular items on the menu, and it was a very moist and tender chicken. I asked for a slice of their sweet potato cornbread on the side. I am a sucker for cornbread. I love it and especially partial to skillet cornbread. The golden amber square of cornbread with specks of brown cinnamon and spices came to the table just shortly after the chicken. It didn't look like any cornbread I had ever seen. I spread a little of the honey butter on a piece and sampled. Oh, wow! I immediately fell in love with this cornbread. The slightly sweet flavor of the sweet potato was very much present and the spices complemented it nicely. Mental note to try making this at home!
Sweet potatoes are featured on the menu from start to finish and speaking of finish, the dessert menu looked good. Mom and I were torn between two desserts, but thought if we were ever going to have a great tasting sweet potato pie, it would be here. Immediately after ordering the pie, I turned to my mom and said, "Did I just order sweet potato pie?" For some reason before ordering, I had an image of the year my sister Leslie and I fell in love with pumpkin pie. We had a slice of the pie for breakfast, a snack, and dessert. I couldn't get enough of that pumpkin pie. So after waking up from my pumpkin pie dream, I realized I had just ordered a sweet potato pie. My previous experience with sweet potato pies were that they tend to be heavy. I like a light, creamy almost mousse texture pie. I snapped myself out of the moment and my reluctance for choosing the pie over our other option. I was going to have an open mind. The pie came to the table. I examined its appearance. Golden brown crust was the base for the layers of sweet potato. "Yes," I said, "layers!" Sitting on top of the crust was a single layer of sliced sweet potatoes and then the common smooth sweet potato layer followed. A dollop of cinnamon whipped cream and a dusting of cinnamon-powdered sugar were the finishing touches.

If the appearance of the pie was any indication of its flavor, then I was in for a treat. The crust had a slight crunchy texture and buttery flavor. The layer of sliced sweet potatoes didn't weigh down the light and creamy top layer of the pie. The flavors exceeded my expectations. It wasn't like any sweet potato pie I had ever had. My mom and I took a bite after bite, being sure to include the cinnamon whipped cream and the dusting of cinnamon-powdered sugar with each morsel. We left enough of the pie on the plate to not feel like gluttons and exited the restaurant with a happy heart and a full stomach. I think I walked off the slice of pie as my mom and I trucked the several blocks back to our hotel. I wish the several blocks was an exaggeration. If only my sense of direction was as good as my cooking because somewhere along the way, my mom and I got a little lost but that story is for another day.

*Try my Sweet Potato Peanut Butter Blondies recipe in my cookbook or my sweet potato banana muffin recipe on my blog http://whitneymillermc.blogspot.com/2011/12/you-can-do-it.html

Wednesday, August 29, 2012

Pizza!

Who doesn't like pizza! My sisters and I loved pizza night at our house. My mom made homemade pizza crust and we girls topped our pizza dough with assorted toppings. When I was younger my pizza would have looked like a blank canvas. I didn't like bell peppers, olives, tomatoes, and mushrooms. Well, what is left? Cheese and pepperoni! When it came to enjoying a pizza with my family, I would take a piece of the veggie loaded pizza with meat of course for my dad and then begin the process of picking off all the toppings. My parents wouldn't order an individual pizza just for me because I didn't like all the toppings. I appreciate now that my parents didn't cater to what I didn't like at the time because my palate evolved. Repetitive introductions to these vegetables provided my palate an opportunity to develop a liking for them. So, parents don't give up if your kids do not like a lot of different vegetables but keep introducing them.
                                                           Stuffed Bell Pepper Pizzas
I thought I would blend together two meals that I grew up eating as a kid, pizza and stuffed bell peppers. For those nights that you don't feel like spending a lot of time cooking, prepare this for dinner. I started off by preparing my homemade tomato sauce. You can skip this step and use a store bought tomato sauce. The rest of the steps just include preparing the stuffed ingredients. This is definitely a kid friendly and picky eater meal because everyone can choose the ingredients to stuff their peppers with. Also, try using the red, orange, or yellow bell peppers.
1) Cut the tops of the bell peppers. Remove the seeds and membrane. Slightly precook the bell peppers, either in the microwave for a minute or for a few minutes in the oven. Peppers should still be firm enough to hold their shape. This step is to ensure the peppers are cooked throughout after final baking.
2) Place the bell peppers in a muffin tin.
3) Spoon enough ricotta cheese (try my homemade buttermilk ricotta cheese recipe- http://whitneymillermc.blogspot.com/2012/03/back-to-basics-cont.html) or cottage cheese to cover the bottom of the bell peppers.
4) Top with diced vegetables such as eggplant, mushrooms, onions, etc., sliced black olives, crumbled sausage, etc. Slightly press down the veggies and/or meats in the peppers.
5) Spoon tomato sauce (try my tomato sauce recipe in my cookbook on pg. 112) over the veggies.
6) Bake the stuffed bell peppers in the oven on 350 degrees F for 15 minutes.
7) Top with shredded mozzerella cheese and bake for an additional 5 minutes or until cheese has melted.
8) Enjoy!


Sunday, August 19, 2012

Presto! Pesto for Dessert?

There are occasions when I need to quickly whip up an appetizer, entree, and/or dessert. I have found one component that takes minutes to prepare and that can really bring a dish together. Add pesto and Presto!

I created a turnip green pesto recipe for my cookbook. Turnip greens grow abundantly in the South. To prepare pesto, a bunch of greens is needed. Basil is traditionally used, but I seldom have the quantity required so I thought turnip greens would work well.
My pesto is very versatile. For a simple appetizer, my family and I enjoy the turnip green pesto with olive oil and focaccia bread for dipping.
I also recommend in my cookbook tossing the pesto with pasta for a quick pesto pasta salad.
In the photo above, I created a mozzerella-pesto stuffed meatloaf. The flavors worked so well together and was a great way to add greens into a dish. With the ooey goodness of mozzerella, even kids won't turn down greens with this meatloaf.

Turnip green pesto is just one version but there are so many other types of pesto that can be created.
Mustard greens have soft leaves and a unique flavor. I created a mustard green pesto to pair with my spiced lamb kebobs but it also pairs well with my eggplant and ricotta "stack." While my turnip green pesto combines turnip greens with walnuts and parmesan cheese, for my mustard green pesto, I add ingredients to compliment the flavor of the greens, pistachio for a slight sweetness and feta for saltiness.

Now, pesto for dessert?
Yes, there is a pesto that tastes great in a dessert.
My mint-pistachio pesto adds a bright, nutty, and slightly sweet flavor to any dessert, especially this easy one.
-Slice, then toast angel food cake
-Melt a thin slice of brie on top
-Spread on a small amount of pesto
-Top with a fresh or cooked fig (or cherry)
Mint-Pistachio Pesto
1 Tbsp. shelled & skinned pistachios
1/4 cup packed apple mint
fruity olive oil (I used California Olive Ranch's Arbequina)

Pulse the pistachios a few times in the food processor. Add the apple mint. Drizzle in a small amount of the olive oil. Process. Add more olive oil to produce a pesto consistency.
This pesto also pairs well with chocolate. Think mint-chocolate chip!


Wednesday, August 1, 2012

Southern Candy Bar

If you have a copy of my cookbook (Modern Hospitality: Simple Recipes with Southern Charm), then you know I like grits. I feature grits in the breakfast, entree, and dessert section. Yes, dessert section. My dad loves the combination of coconut and chocolate. I created this simple dessert using basic, inexpensive pantry ingredients that you probably already have on hand. You’d never guess that the secret ingredient in these decadent little bites is a Southern staple: grits!

This is the heading for my Crispy Coconut Bites with Chocolate Sauce recipe in my cookbook using grits. Keeping with my inspiration for this dessert, I decided to create a Southern candy bar for my dad. Grits pair well with coconut because the texture of the grits melds with the texture of the coconut. Even if someone is not a fan of grits, they would probably not even know they were eating grits in this dessert. I actually have proof of that statement. I was conducting cooking demonstrations for Women's Health magazine's "Are You Game" event last year in both Chicago and New York.
I prepared my crispy coconut bites for the event. Before the women sampled the bites, I told them that I was not going to tell them the secret ingredient until after they ate it. I watched as they took a bite. Smiles and expressions of joy filled their faces. They liked it; so I thought they were ready to hear the secret ingredient. The secret ingredient I told them is Grits! You should have seen the faces of the New York ladies who have probably never even seen grits before. I heard from the crowd, "but we don't like grits." I said, "well I guess you do now haha! " They all laughed. The story to be learned, if you think you don't like grits, try my crispy coconut bites and this recipe for my Southern candy bar.
Southern Candy Bar
1 cup coconut water
1/3 cup coconut milk
½ cup quick cooking grits
2 Tbsp. granulated sugar
½ cup shredded sweetened coconut
12 pecan halves
½ lb. chocolate, preferably bar not chips (milk, semi-sweet, or dark)

Bring the coconut water and milk to a slight boil in a small saucepan over medium-high heat. Whisk in the grits and reduce heat to low. Cook, stirring occasionally, until the grits reach porridge consistency, about 5 minutes.

Remove from the heat and stir in the sugar and shredded coconut. Spoon the grits mixture into a wax paper-lined loaf pan. Spread out evenly with a rubber spatula and let cool at room temperature for 2 hours or until slightly firm.

After 2 hours, cut the coconut mixture into 12 rectangles.

Chop the chocolate into small chunks.
To temper the chocolate, fill a small saucepan with a few inches of water. Bring the water to a simmer over medium heat. Place a bowl on top of the saucepan and add a third of the chocolate chunks. Once the chocolate starts to melt, begin stirring the chocolate. Stir in the second-third of the chocolate chunks until melted. Then, stir in the last of the chocolate chunks until smooth. Transfer the bowl to the counter lined with a kitchen towel.

Lay out a large piece of wax paper on the counter.

Working with one bar at a time, place a bar on a slotted spatula. Top each bar with a pecan halve in the middle of the bar. Spoon melted chocolate over the bar until completely coated. Lightly tap the spatula to remove excess chocolate. To cover the bottom side of the bar, spoon a line, the size of the bar, of chocolate on to the wax paper. Using a butter knife, slide the chocolate coated coconut-grits bar onto the line of chocolate. Repeat with the rest of the coconut-grits bars. Allow to rest until chocolate has hardened.

Enjoy immediately or store in an air-tight container.

Makes 12 bars

Sunday, July 29, 2012

Campfire S'mores Scones

During my recent trip to Los Angeles, my mom and I rented bikes and hit the streets, biking to Venice Beach and Abbott Kinney Street. Parking the bikes, we ate our way down the street, starting with GTA (Gjelina Take Away). We sampled their brown sugar-blueberry scone. I loved the contrast of the crunchy scone exterior with the soft bready inside. The rich flavor of brown sugar not only topped the scone, but permeated throughout.
Continuing to walk, luckily the clothing shops were closed or I would have been greatly distracted, we happened upon a long line of people at what looked like a small cafe. The sign on the wall read Intelligentsia. Curious, I asked a man standing nearby who told me that this was the best coffee shop and by the way, it also had the best pastries. Of course, we couldn't move on after hearing this, so we joined the crowd outside. While standing in line, we took in the atmosphere. It was very much an earthy, industrial feel. Outside the small glassed entrance were concrete walls; greenery extended up one wall, flanked by earth friendly wooden slatted benches and tables. After arriving at the front of the line, I placed an order for a latte and a campfire s'mores scone. The pastries looked familiar to ones I had seen at Short Cake cafe/bakery located in the Farmer's Market at the Grove. My suspicion was confirmed by the barista who told me how their pastries were provided by Short Cake.
I watched as "my friendly barista" ground the beans for my latte and after brewing then poured the espresso. Lastly, she slowly added the Straus Family Creamery's cream forming a beautiful design in front of my eyes.
It was definitely worth the wait. It was the best latte I have ever had; the smoothest latte without a bitter aftertaste. The accompanying scone was really good also, different from GTA'S in shape and texture. It was round, a common shape for British tea scones, whereas GTA's was more triangular. The s'mores scone's texture was crumbly to the fingers, soft and moist to the tongue, with chunks of chocolate and a sticky marshmallow topping.

Last night as I was watching the Olympic's women gymnastic competition, I had a hankering (Southern slang word for craving/desire) for something sweet. I thought about that wonderful s'mores scone I had in LA. I knew that I already had a great scone recipe that I developed after returning from South Africa. By tweaking that recipe, I could create a s'mores scone. For the graham flavor, I processed enough graham crackers to equal 2/3 cups. My original scone recipe http://whitneymillermc.blogspot.com/2012/06/sweet-memories-from-south-africa.html calls for 1 2/3 cups so I thought I could get enough graham flavor with the two-thirds.

I removed my scones from the oven and then thought about how I would toast the marshmallow topping. Without really thinking it through, I dolloped the topping on the scones; then returned them to the oven to broil. I peered through the glass of my oven to see the marshmallow topping melt off of the scones. I quickly retrieved the scones from the oven. Oh no! I hope I didn't ruin my scones. I tried to wipe away the excess melted marshmallow topping before my scones became too soggy. To repair the ones that were damaged, I placed them back in the oven on bake to hopefully evaporate the moisture. Thankfully, it worked! I made more maple marshmallow topping and this time pulled out my handy dandy blow torch to toast the tops. *You can also take store bought large marshmallows, halve them, top the scones and broil in the oven. Because they are more of a solid, they should toast before the marshmallow melts. Then enjoy the ooey gooey deliciousness!
Campfire S’mores Scones
Scones:
About 8 graham crackers
1 cup self-rising flour
1/8 tsp. baking soda
¼ tsp. baking powder
Pinch salt
1/3 cup unsalted butter cut into cubes, cold
2 ½ Tbsp. light brown sugar
1 large egg plus 1 egg (egg wash), beaten
4 Tbsp. buttermilk
1/3 cup semi-sweet chocolate chips
Maple marshmallow topping:
1 envelope unflavored gelatin
¼ cup plus 2 Tbsp. pure maple syrup
Preheat oven to 425 degrees F. Grease a baking sheet with cooking spray.

Process enough graham crackers, in batches, in a spice grinder or food processor until the texture of flour, to produce 2/3 cups. Pour graham flour into a large mixing bowl.
Sift the flour, baking soda, baking powder, and salt in a large mixing bowl. Rub the butter into the graham-flour mixture with your fingers until it is the size of breadcrumbs. Stir in the sugar.
In a small bowl, beat the egg and buttermilk until combined.
Stir the egg mixture into the flour mixture and mix until just combined. Stir in the chocolate chips. Then using your hands, lightly knead the dough together to form soft, slightly sticky dough.
Place the dough on a floured surface and shape into a sphere then pat down about ¾-1 inch thick. Using a floured 2-inch cookie cutter, quickly push the cutter down through the dough and lift without twisting. Cut out scones, reshape dough, and repeat. Creates about 12 scones.
Place the scones on the greased baking sheet and brush the tops of the scones with the beaten egg.
For the maple marshmallow topping: Sprinkle the gelatin over ¼ cup cold water in a small saucepan. Stir over low heat until dissolved.  Add the maple syrup. Mix well, then heat over medium-high heat until it almost comes to a boil.
Pour the warm syrup into a deep mixing bowl. Using an electric hand mixer beat on high speed for 6 minutes.
Place the scones in the oven and bake for 7 minutes. While the scones are baking return to mixing the marshmallow mixture for another 6-7 minutes or until doubled in volume and forms soft peaks.
Transfer the scones immediately to a wire rack to slightly cool.
Once scones have slightly cooled, spoon a dollop of maple marshmallow topping on each scone. Using a hand torch, toast each marshmallow topped scone until browned.
Serve slightly warm.
Makes about 12 scones

Tuesday, July 3, 2012

4th July Festive Foods

4th July is always a favorite holiday of my family. What makes it special is that it is also my mom's birthday. My family and I have spent 4th July at some fun places like the beaches of Florida and patriotic Boston, MA.
         On the 4th July a few years ago, at the Marriott Grand in Point Clear, AL, enjoying s'mores
         on the beach.

Fireworks are one of the most important parts of celebrating my mom's birthday on the 4th. Allow me to describe how important fireworks are to her. My mom had my sister, dad, and I stand on a huge bridge with a crowd of people in the RAIN to watch the huge fireworks show in Boston.
Not only are fireworks an important part of the celebration but more importantly the food. Whether our 4th July spread is on a picnic table, at the beach, or in our back yard; one thing stays the same the food is flavorful and fun!
Squash, zucchini, tomatoes, peppers, watermelon, figs, peaches, strawberries, and blueberries are all abundant right now so take full advantage!
My mom's recipe for her crispy pita BLT uses squash and jalapeno peppers in a unique way by oven-frying them. You can find her recipe in this month's issue of Taste of Home.
If you are wanting to crank up your grill, my miracle marinade in my cookbook will make any meat tender, flavorful, and mouth-watering good!
Miracle Marinade
1 tsp. olive oil
4 tsp. finely diced onion
8 Tbsp. soy sauce
2 tsp. apple cider vinegar
2 tsp. sugar
½ tsp. paprika
2 tsp. lime juice
2 tsp. orange juice
½ tsp. garlic
¼ tsp. fresh ginger

Heat a small skillet over medium heat. Add 1 tsp. olive oil and onions. Cook until caramelized about 2-4 minutes.

Combine the remaining ingredients into a small bowl.
Stir in the caramelized onions.

Use Immediately or store in an airtight container in the refrigerator for up to 1 week.
Makes: ½ cup

If the grill is too much work for you, keep it simple and prepare bbq pulled pork, recipe found on page 55 in my cookbook, in the oven. I love to serve my coleslaw and creole succotash alongside.
For a knock-your-socks-off dessert, my cool and creamy strawberry cream cupcakes are the perfect 4th July dessert. Add blueberries to create a festive red, white, and blue treat!